22nd January 1879
Isandlwana – Rorkes Drift – Fugitives Drift – Helpmekaar
(travelling distance based in Dundee 200km)
The initial battles of the Anglo Zulu War of 1879 are world renowned; the British defeat by the proud Zulu army at Isandlwana on 22 January 1879 and then the heroic stand by a handful of British soldiers at Rorkes Drift later that same day and night.
11 Victoria Crosses were awarded for the defence of Rorkes Drift and 1 for the battle of Isandlwana.
At Fugitives Drift the memorial to Lts Coghill and Melvill, who saved the Colours, stands high above the Buffalo River valley where the survivors from Isandlwana struggled to cross the swollen river.
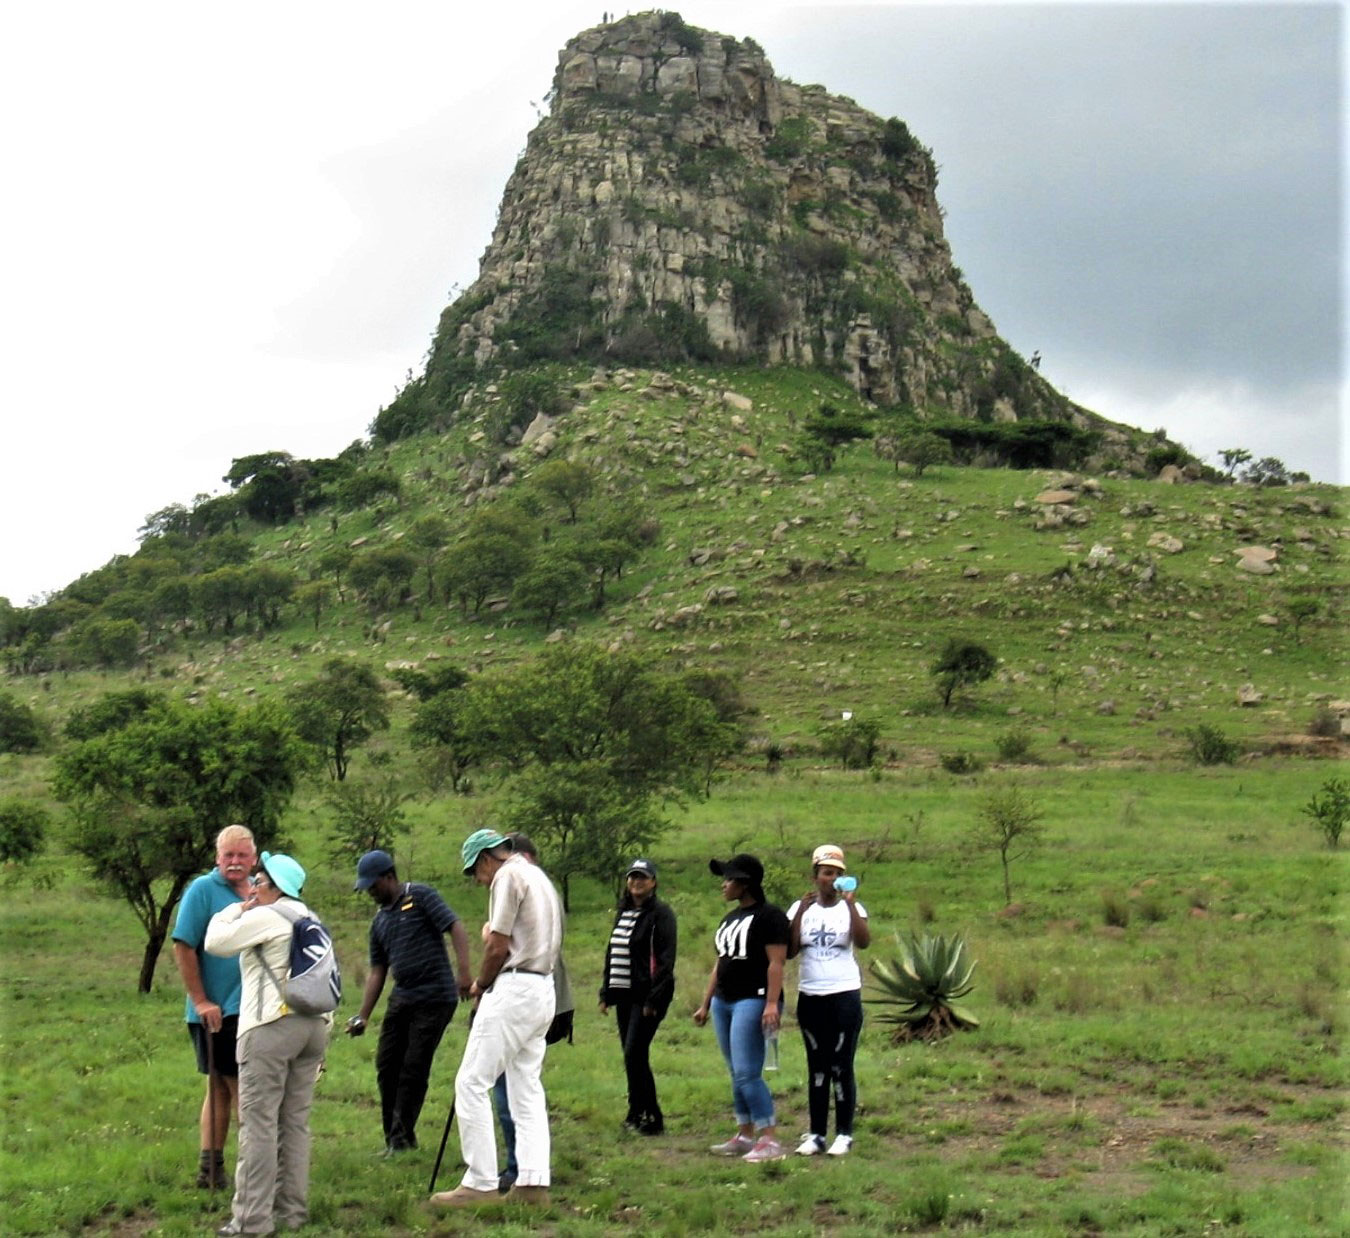
Isandlwana
King Ceteswayo, on his succession in 1872, set about building up the Zulu Kingdom. The colonists of Natal saw this as a threat.
On the 11 December 1878 an ultimatum was presented to the Zulu indunas. They carried the message to King Ceteswayo. With the expiry of the ultimatum on 11 January 1879, the British troops that had been massing on the Natal borders invaded Zululand.
The target of the British invasion was Ulundi, site of the Royal homestead, Ondini. The British troops were divided into 5 columns. One would advance from the coast, two would invade from Northern Natal (Utrecht and Rorke’s Drift), and two would patrol the Transvaal and Natal borders.
The second and third columns under the command of Col. Glyn, with Lord Chelmsford, the Commander-in-Chief, accompanying him, crossed the Buffalo River at Rorke’s Drift and invaded Zululand.
On the 12th January, portions of the British army attacked Sihayo’s kraal and were surprised to find themselves being shot at. Sihayo had managed to obtain 2 small cannons and had built these into caves in the hillside. They had made cannonballs of anything- scrap iron, including the legs of cooking pots and rocks, which the women had spent months rolling into round balls.
Despite their surprise, the British troops defeated Sihayo and opened up the route for the advance to Isandlwana.
On 21 January the main Zulu army of 20 – 25,000 men under the command of Ntshingwayo and Mavumengwana took up position in a valley north of the Nqutu escarpment. They lit no fires and were waiting in silence for the 23rd – the day after new moon – to attack the British camp.
On 22nd January, Lord Chelmsford left the British camp with about half the men to go to the aid of Major Dartnell, to the east, who believed they had come into contact with the Zulu army. Chelmsford left the camp in charge of Col. Pullein with five companies of the 1/24th and one of the 2/24th, (67 officers and 1,707 men), the remainder of the mounted troops and 4 companies of the NNC and 2 guns. The camp was not entrenched as it was considered to be a temporary base and also not in danger of attack. The wagons were to bring up supplies from Rorkes Drift and were therefore not used to create a laager and to defend the camp.
At about 10:30 a.m. Col. Durnford, who had been ordered forward, arrived from Rorke’s Drift with 5 troops of the Natal Native horse.
The arrival of Durnford put Pullein’s position as commander of the camp in question. Durnford was nine years older, was three years senior and had had considerable experience in S.A. (he had gained a reputation for bravery in the Frontier Wars where he had lost his left arm).
Durnford’s orders from Chelmsford were not explicit but the implication was that he was to act as reinforcement for the camp in the absence of Glynn’s column and by his seniority would assume over-all command. On arrival Durnford did not stay in the camp – he immediately sent troops of the Sikali Horse under Lt. Raw on to the plateau to clear it of scattered parties of Zulus.
The men in the camp then sat down for their midday meal. While having lunch a report of Zulus to the North east moving eastwards was received. Durnford decided to ride out with two troops of the Natal Native Horse to prevent this force moving against Chelmsford.
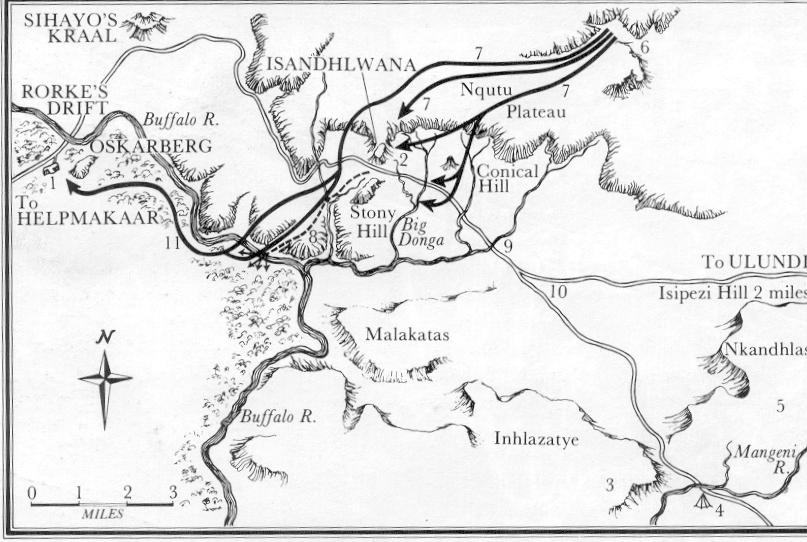
1. Rorkes Drift Mission Station
2. Camp at Isandlwana
3. Dartnell’s bivouac 21 –22 January
4. Site of new camp
5. Chelmsford’s breakfast site 24 January
6. Ravine where the Zulu impi was found
7. Zulu attack on Isandlwana
8. Fugitives route
9. Where Hamilton Browns watched the attack on Isandlwana
10. Where Chelmsford met Lonsdale
11. Zulu attack on Rorkes Drift
At about midday Lt. Raw’s troop gave chase to Zulus driving cattle up a slope and on reaching the top looked down into a deep ravine. Sitting in silence was the main Zulu army. Upon being discovered, the entire army rose to feet and started to move forwards. Messengers were immediately sent to warn both Durnford and Pullein of the impending attack. Durnford was some 4 miles from camp when he received the warning and at the same moment, the Zulu left horn advance over the skyline. Durnford opened fire and began to retire back to the camp.
 In the camp Pullein set the remaining troops out in a half square – with troops in a line up onto the edge of the Nqutu plateau and then along to the right reaching out to Conical hill to give Durnford some protection. The whole line, 1 and a half miles long, faced north and northeast. The Zulu advance was rapid. The attack of the Zulu centre and left, stalled under the British rifle fire, but resumed at about 1 p.m. The right horn continued its wide flanking movement and the centre began a direct assault on the camp.
Durnford’s force was critically short of ammunition and retired on the camp. The British line was in danger of being outflanked and Pullein ordered the “retire” to be sounded and so the British troops fell back on the camp. The N.N.C. broke ranks and fled and the Natal Native Horse also galloped away – they had fought well but had no more ammunition and could do nothing. However, on the west side of Isandlwana they found themselves barred by the Zulu right horn and consequently fled in a south-westerly direction down a ravine, which led to the Buffalo River.
Just before noon, there was an eclipse of the sun and a Zulu warrior of the uNotenke Regt. Said the “sun turned black in the middle of the battle. Then we got into the camp and there was a great deal of smoke and firing. Afterwards, the sun came out bright again.”
In the camp ammunition gave out and organised resistance was at an end by 2 p.m., although some isolated groups fought on until late afternoon. Probably the last group to die was Younghusband’s company that had held out on the plateau of Isandlwana hill.
Shortly before the end of the battle, Lt. Melvill was ordered to ride to safety with the Queen’s Colours of the 24th Regt. He fled down the route known as Fugitives Trail and was joined by Lt. Coghill. On reaching the Buffalo River, Coghill got across, but Melvill was swept off his horse and Coghill rode back into the river to help him. They managed to reach the Natal bank but were soon caught and killed. The Colour was swept down the river and recovered some weeks later. Messages to Chelmsford eventually reached him and he ordered an immediate march back to camp. They reached the camp after dark and were ordered to spend the night on the battlefield.
As was Zulu tradition the dead bodies had been ripped open to release the spirits. During the plunder of the camp, the stores, liquor and even medicines had been consumed and the men camping on the battlefield did so amongst the dead bodies, cries of dying Zulus from the medicines and poisons consumed and with the sounds of battle carried across from Rorkes Drift.
CASUALTIES
| British | 52 Officers | 1277 Troops |
| Zulu | excess of 1000 | |
To see at Isandlwana:
Interpretation centre and museum at St Vincents
Memorials to British and Zulu’s who died in the battle on the battlefield
Cairns marking where soldiers were buried
Visiting hours
Open daily 08h00 – 16h00
Entrance fee payable
How to get there
From Dundee follow R68 towards Nqutu –(32km) turn right to Rorkes’ Drift, follow signs. At T junction turn left to Rorkes’ Drift. Just before Rorkes’ Drift turn left and follow signs to Isandlwana. Pay entrance at St Vincents before proceeding onto battlefield.